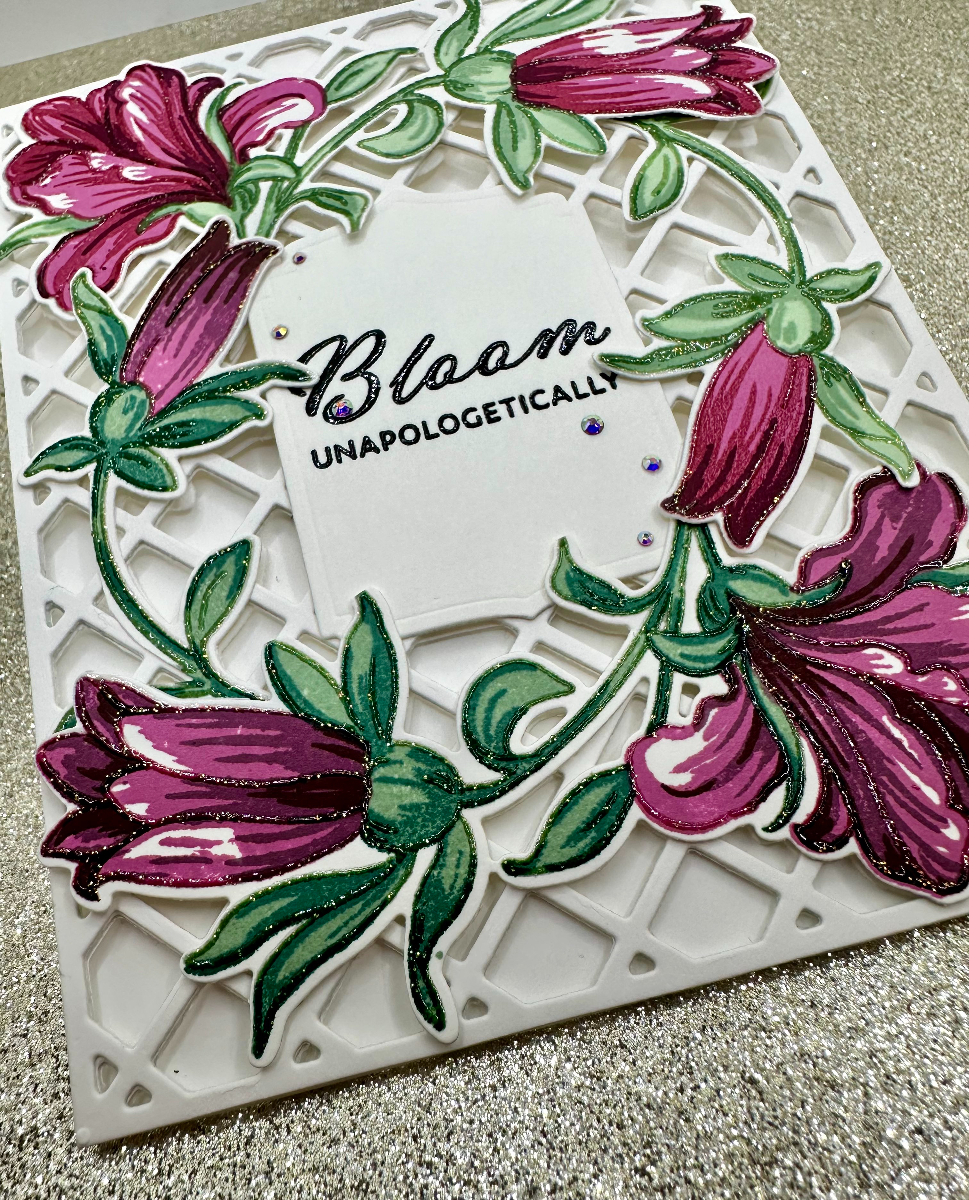
Hello and Good Morning! I know, you may be seeing this at night or in the afternoon, I always say good morning, I feel like it sounds more cheerful! 🙂
Today I have a card project for you inspired by the Altenew Academy course All About Layering 4. I used several of the techniques described throughout the course in my final card.
The techniques I chose from the class include cutting away part of the front of a card, trimming die cuts to affect a different look, and using additional white die cuts on the front inside of the card to give the inside a more finished appearance.
The “Bloom Unapologetically” sentiment I chose for the front of the card is from the Endless Florescence Outline Stamp and Die Set.

First, I started by cutting away part of the card front to get a peek through effect. For this I used the Garden Trellis Cover Die to partially die cut the front of a top folding A2 card from Neenah 110# Solar White. I supplemented this with 2 additional die cuts in the same exact cardstock (very important, if you do not, the die cuts WILL NOT line up properly, ask me how I know ;-p) to add to the front and back (inside) of the card front for stability and finishing touches (the back of a die cut never looks that great, so, flip it over and take care to glue it precisely over the same lines on the inside).

For this card I used the Build-A-Flower: Giant Bellflower Layering Stamp and Die Set. After I finished with the layering stamps and they were dry, I placed them back in my stamp positioner, dusted them with anti-static powder and applied a layer of Versamark Embossing Ink. I wanted a bit of sparkle to give more highlight and dimension to the images, so I used a clear sparkle embossing powder and heat set it.
I die cut the layered images as well as additional white die cuts of the arrangements to cover the backside of the layered flowers that were adhered to the front of the card.
I embellished the card with crystals in Crystal AB with sizes ss3, ss6 and ss8. A good alternative would be the new Iridescent Crystals Gem Sparkles, which has three sizes in one convenient package.
Additionally, instead of keeping the flower arrangement in one piece, I trimmed them to find a new way to present the images. I tried out different arrangements of the flowers until I found one that I really liked and left space for a sentiment.

For the stamped sentiments, I cut 4 of the second smallest frames from the Ornate Nesting Die Set, stamped and layered two for the front of the card, one for the inside front, and stamped the inside sentiment on the last and lined them all up to appear unseen from the front, when the card is closed.

I chose the “you are not here to be average. you are here to be awesome” for the inside sentiment, which comes from the Craft Your Life Project Kit: Vintage Tapestry set. I wanted to make sure I kept the sentiment within the borders of the Ornate frame die so that it could not be seen from the front, when the card was open.


